Sunday, August 29, 2010

Mini Pumpkin Treat Bags

Halloween is around the corner.  Here is a really cute bag to make for the little people in your life.  Even if you don't do Halloween, pumpkins cross all boundaries.  They can be easily adapted for other themes.

All seams are ¼ inch. Basic sewing supplies are needed beyond the list below. Basic sewing skills are also necessary. This is a simple bag that can be adapted to make a more complex bag. Sizes can also be changed. Just use a rectangle.


Materials Needed
Black rick rack, about 8 inches long
Scraps of black fabric

2 pieces of orange fabric, 5 ½ x 6 ½

2 pieces of other fabric, lining 5 ½ x 6 1/2

Grosgrain ribbon for handles, ½ inch wide cut 2 pieces 10 in long

Double sided fusible web, scraps

Fray check, optional
1. Draw eyes and a nose on the paper backing of the fusible web. Peel the other side of the paper off. Place the web on the wrong side of the black fabric. Carefully cut out the eyes and nose.
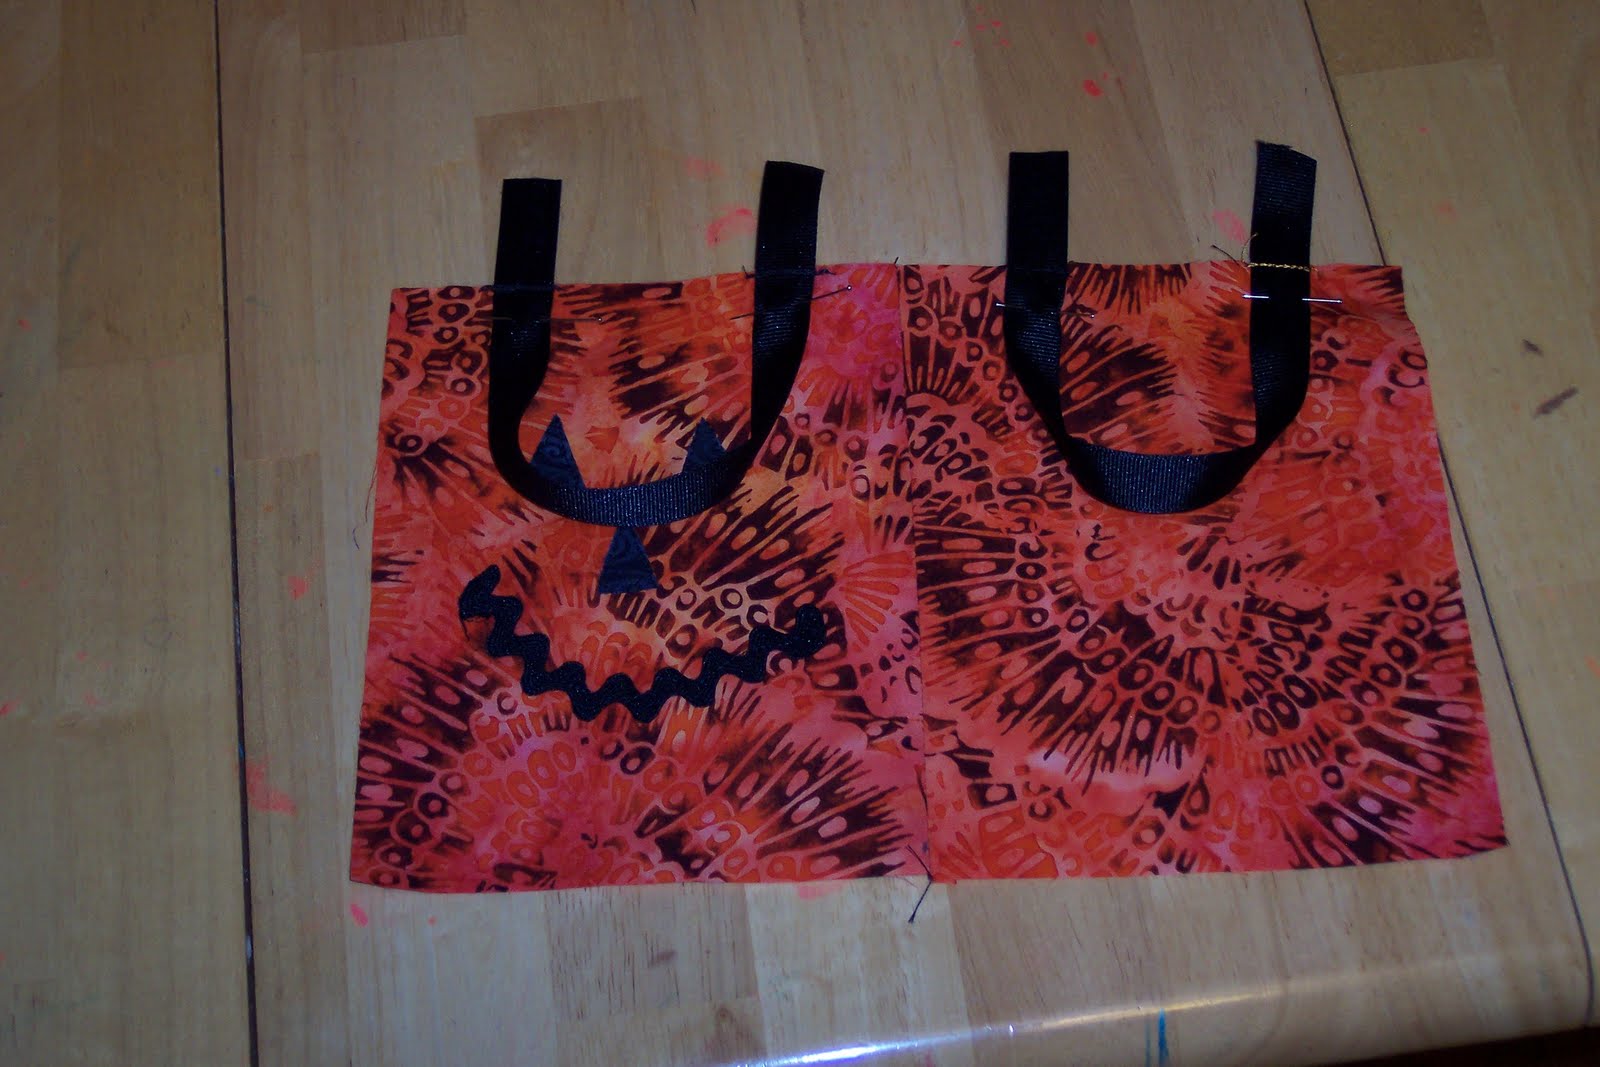
2. Center the eyes on the orange fabric. Peel the paper off the back. Do the same for the nose. When you are happy with the look, iron them down. Read the directions for the fusible web and iron as directed. I like to stitch around the fused pieces for added stability. This gives you a pumpkin face.


3. Pin the rick rack on the orange fabric to form a mouth. The ends will eventually fray. Fray check may help or zigzag the ends. Trim exceeds off. Sew down the center of the rick rack.


4. To make the handles, use ribbon.


5. Pin the handles on the front and back of the orange pieces 1 inch from the edge. Stay stitch close to the top edge.


6. Place the orange pieces right sides together, and sew the right side.


7. Iron the seam open. Place the orange fabric right side up. Pin together. Make sure the handles are inside and not hanging out. Sew along the left side and bottom of the bag.


8. For the lining, pin the 2 pieces right sides together. Make a mark on the left side 2 inches from the top and bottom. This will be left open, to turn the bag. Start sewing from the top mark and sew to the top edge and stop. Go back to the bottom mark and begin sewing all around the bag, until you reach the top edge. Remember to lock stitches at the beginning and end.


9. The lining should be right sides together. Take the outer bag (pumpkin face), it should be right side out, and place inside the bag lining. Pin them at the top. Sew around the top of the pumpkin bag.


10. Reach in the opening and pull out the bag. Push corners in, straighten the bag as you go. Iron. Hand stitch the opening closed. I like to stitch the top edge, it looks more professional.


These little bags are a lot of fun.  Be careful they are addictive.

Happy Quilting!

Friday, August 27, 2010

It's Finished!

The baby quilt is finally finished.  It's an absolute miracle, too.  Have you every had one of those projects that had one problem after another?  That's what this quilt was.  The pattern was easy.  Originally, I was going to follow the QM pattern for Lotsa Pops.  The background fabric I chose, periwinkle, didn't go with anything.  According to the pattern a plain square was to be placed between each Popsicle.  I didn't have enough of the periwinkle, and evey other color I tried just looked wrong.  I go back to look at the pattern online.  I find the other Linus quilt patterns.  OK, I'll use on of these as a setting block.  Using the periwinkle as the predominate color.  That worked.  Problem solved.

New Problem.  The mother of the baby doesn't like pink.  Of course pink was the best color for the border.  So I off set it with purple.  Colors look really good.  I didn't have enough of one fabric for the backing so I just pieced it.  I've always wanted to try that, no problem!  
       
I decide to machine quilt it.  Even though I don't have a lot of experience with that.  My sewing machine had other ideas.  The
tension was wrong and I could not fix it.  I had little loops every 6 inches or so down the quilting line.  Sooooo, I ripped it all out
and hand quilted it.  I prefer hand quilting anyway.

While trying to bury a knot the needle breaks inside the quilt.
Ugh!  I cut a hole trying to find the needle.  Can't find it.  I get my husband to get his borrowed metal detector...still no needle.  We eventually find the needle tip and pull it out.  Now I'm left with a
2 inch gash in the back.

I remember my grandmother telling me that all quilts should have red.  So I made a red heart applique to cover the hole.

Lastly, all that was left was the label and binding.  I used a quilt label transfer to make the label and sewed it on.  I hate doing the binding.  But by a miracle the binding was no trouble.   Currently the quilt is in the dryer getting all nice and cuddly.  I have never been so happy to finish a quilt!

I'm very happy with how it turned out.  It was a true odyssey getting it completed!  Any similar stories out there?

Happy Quilting!


Wednesday, August 25, 2010

Using Freezer Paper to make a Quilting Template

This technique comes in handy when you don't want to mark the quilt.  This great if you don't plan on washing the quilt, or if the colors/fabric of the quilt make it difficult to mark.
Materials:
quilt sandwich
needle
thread
scissors
freezer paper
cookie cutter
pen
iron & ironing board.

1.  I'm currently making a baby quilt for my
     cousin.  So that is the example I am using.
     First, pick a cookie cutter that fits the theme of
     the quilt and fits the space available.  This on
     is about 3 inches wide.
2.  Trace the cutter onto the flat side (non shiny)
     side of the freezer paper.  Then cut out
     on the line.  Be careful to cut straight.
3.  On the cotton setting of you iron, iron the
     Shiny side down.  Do not place the iron
     on the shiny side.  It will stick.  I know from
     experience.  Iron until it sticks fairly well.  I
     don't time it.  I guess 25-30 seconds.  If it is
     not ironed enough it will not stick well.  If you
     too long, you may burn the fabric.
4.  Then quilt around the edge of the paper.  Use
     small stitches.  They go around curves
     better.  When you are finished quilting around
     the template, pull it off.  I have heard you can
     reuse these templates, but they will not stick
     as well.  Sometimes they begin to wiggle as
     you quilt, so limit the number you heat at one
     time.

If you try this technique let me know how it
works for you.

Happy Quilting

Saturday, August 21, 2010

My First Day

Welcome to As the Thread Breaks...  I am new to the blogging world, sew bear with me.  I am a wife, mother, art quilter, crafter, and now a freelance writer.  I live on the beautiful, sunny Gulf Coast.  This blog will be an eclectic mix of my interests, including a few tutorials.  I hope my posts will teach you a new technique, encourage you to try something new, or maybe find something you like.  I have been cruising the web all day  learning all about the web, blogs, and widgets.  I never knew I didn't know so much!  It all looks like fun. 

My current project is a baby quilt for my cousin.  It is a combination of 2 Linus quilt blocks.  I used Hopes and Dreams and Lotsa pops, it looks very cute, very cheerful.  My first real entry will be in a few days and I will be talking about marking quilts before you quilt them.  It will be good for newbies to quilting.  I do want to share one quilt before I go.  I made this for a challenge from Quilting Arts magazine.  It did not win, but it was a lot of fun!    Happy sewing.